Managing Your Site with cPanel
Once your domain is connected and your hosting account is active, the real power begins inside cPanel—your web hosting control panel. cPanel is a user-friendly dashboard that gives you complete control over your website, files, emails, databases, security, and more. Whether you want to install WordPress, create professional email addresses, manage files, or monitor your hosting usage, cPanel puts all the tools at your fingertips. In this chapter, we'll walk you through the most essential features you’ll use to manage and grow your website efficiently.
- About Emails & File Management
- About FTP Connections
- About Databases
- About Domains
- About WP ToolKit
- About Cron jobs
About Emails & File Management
Your Step-by-Step Guide to Accessing and Using Your Web Hosting Dashboard
Welcome to your SiteDeploy web hosting account! This guide will walk you through how to access your cPanel dashboard and manage essential features like email accounts, files, and backups.
1. Accessing cPanel
After purchasing your web hosting package, you will receive a welcome email containing:
-
Your cPanel login link
-
Your username
-
Your password
How to Log In:
-
Open the cPanel login link from your email.
-
Enter your username and password.
-
Click Log In.

Once logged in, you’ll be taken to your cPanel dashboard, where you can control everything related to your website and hosting.
2. Navigating the cPanel Dashboard
The cPanel interface is designed to be user-friendly and easy to navigate. From here, you can manage email accounts, website files, databases, backups, and more—all in one place.

a. Managing Email Accounts
With cPanel, you can create and manage custom email addresses linked to your domain (e.g., yourname@yourdomain.com).
b. Creating an Email Account
-
In the Email section, click Email Accounts.

-
Click the Create button.

-
Enter the username you want (e.g., info@yourdomain.com).
-
Choose a password or use the password generator.
-
Click Create.

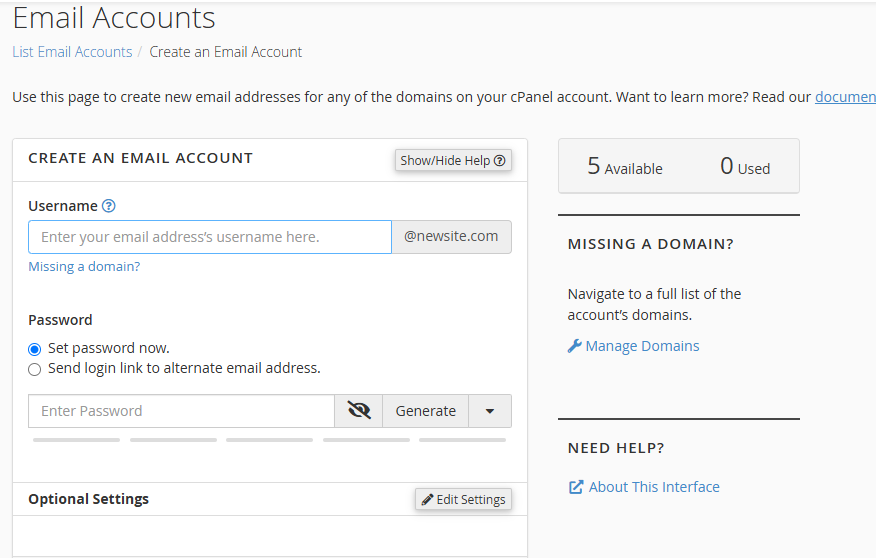
Your new email account will now appear in your email account list.
3. Managing Email Accounts
You can:
-
Search and filter your email accounts (e.g., by usage or storage).
-
Access webmail to send and receive emails.
-
Connect devices (like Outlook, Apple Mail, or Thunderbird).
-
View and adjust storage limits.
-
Reset passwords, delete accounts, or change settings.

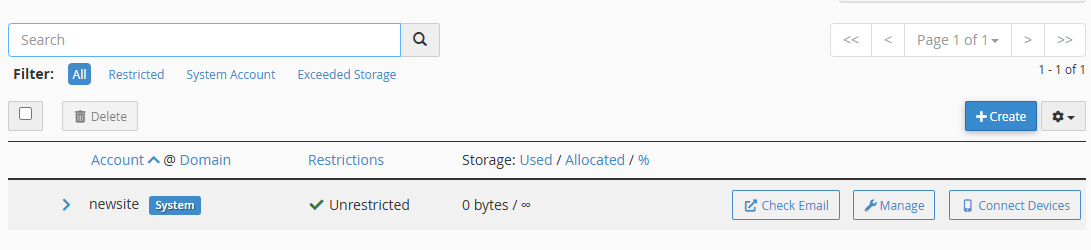
System Email Account
You may see a default system email account tied to your cPanel username. This account is used for server communications and can’t be deleted. It doesn’t use your regular storage quota and shares the same login as your cPanel.
4. Managing Website Files
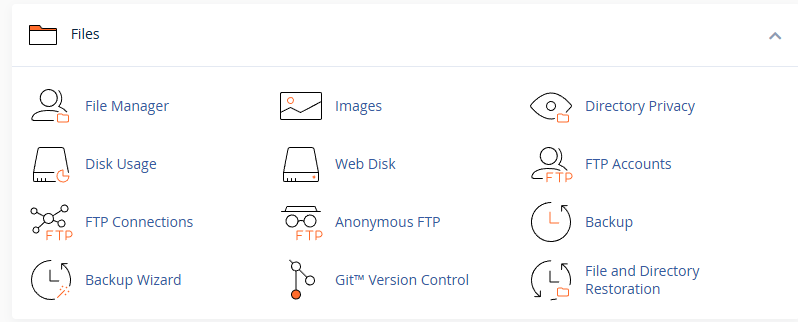
cPanel includes a powerful File Manager, allowing you to manage your website files directly from your browser—no extra software needed.
Using File Manager
-
Go to File Manager in your cPanel dashboard.

-
Inside the public_html folder, you’ll find the main files for your website.
-
You can:
-
Upload new files (HTML, images, scripts, etc.)
-
Edit, rename, move, or delete files
-
Create new folders
-
Change file permissions
-
View file details (size, last modified, type)

-
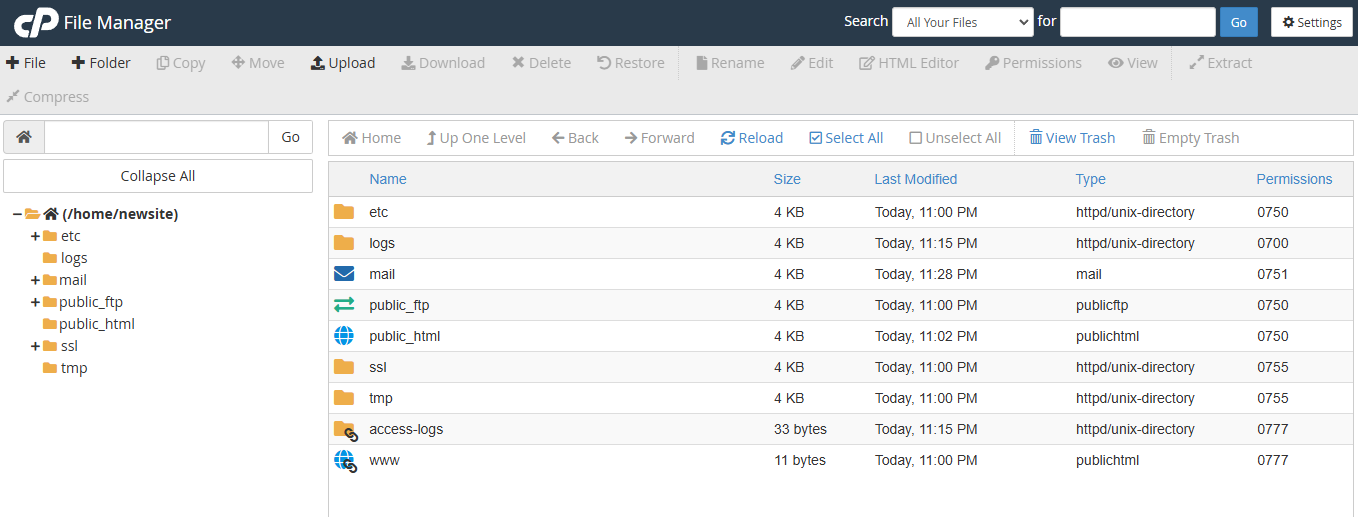
This is especially useful if you're managing your website manually or want to make quick updates.
5. Backing Up & Restoring Your Website
Keeping a backup of your website is essential in case of accidental deletion, updates gone wrong, or server issues.
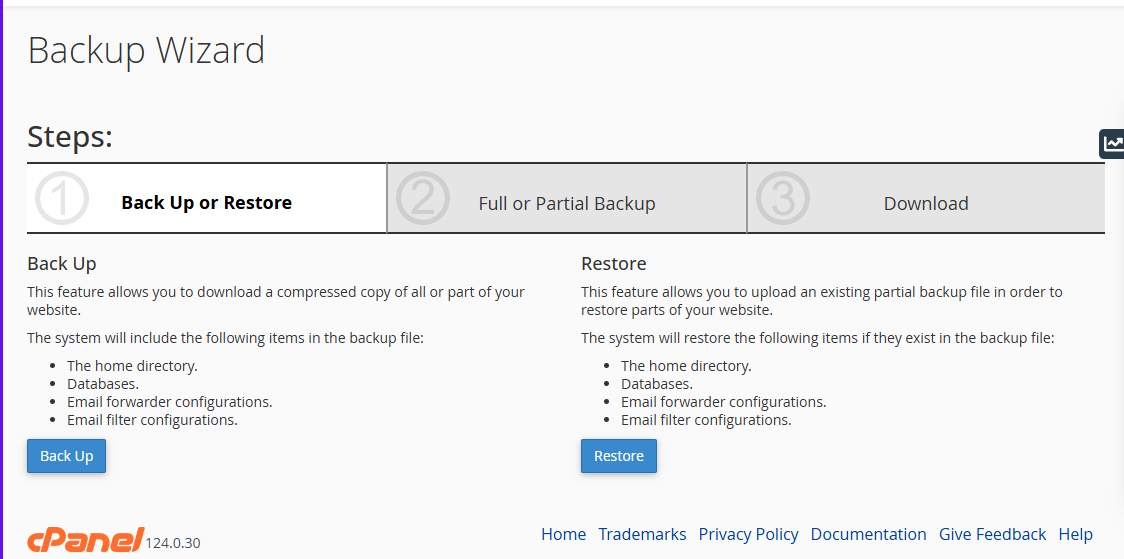
a. Backup Wizard
The Backup Wizard helps you create and restore backups easily.
You can:
-
Download a full backup (everything in your account)
-
Download partial backups of:
-
Home Directory
-
Databases
-
Email settings
-
-
Restore partial backups (upload a backup file to recover specific parts of your site)

b. Backup Tool
The Backup tool gives you more control if you want to download a complete or partial backup manually.
You can:
-
Download a Full Backup (complete account: site files, databases, email, settings)
-
Download Partial Backups (just specific areas)
-
Create an Account Backup to save configurations and preferences

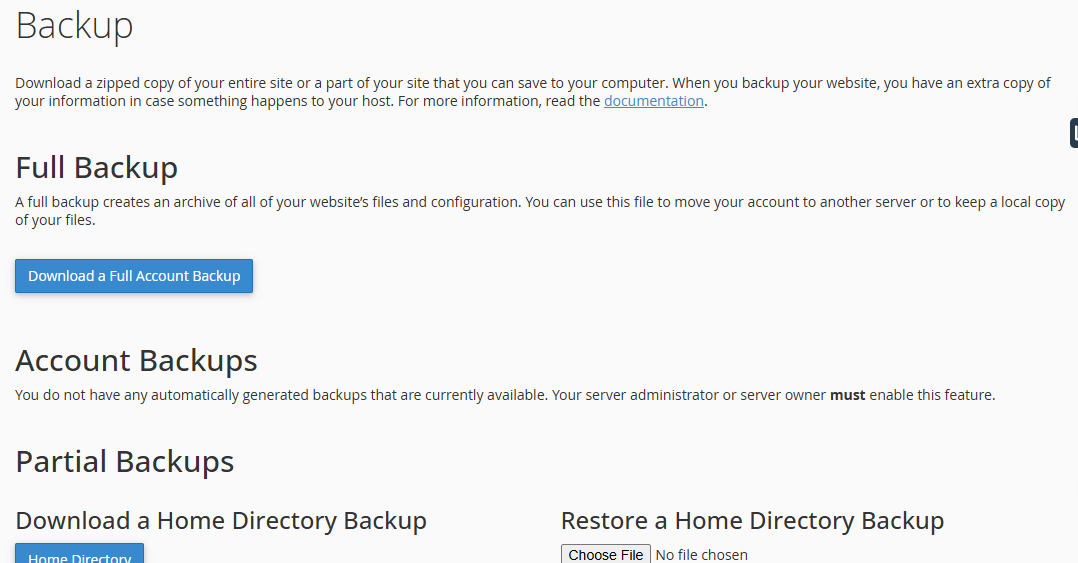
It’s a good practice to download backups regularly and store them safely.
Tips for a Smooth Hosting Experience
-
Always keep backups of your site before making major changes.
-
Regularly check email storage and clean up old messages.
-
Use secure passwords for all email and cPanel accounts.
-
Install a free SSL certificate via cPanel for secure HTTPS access.
-
Use cron jobs only if you're familiar with automated tasks and scripting.
You're Ready to Go!
Now that you know how to access cPanel and manage essential features, you're fully equipped to take control of your website. Whether you're creating a simple blog, launching a business, or building something more complex—everything you need is right at your fingertips.
Would you like this turned into a branded PDF, with screenshots and formatting? I can prepare that too.
About FTP Connections
The FTP Connections tool in cPanel allows you to monitor and manage users currently connected to your hosting account via FTP (File Transfer Protocol). This is an important feature for maintaining the security and integrity of your website files. By reviewing active sessions, you can detect unauthorized access and terminate suspicious connections when necessary.
1. What Is FTP?
FTP (File Transfer Protocol) is used to transfer files between your computer and your web hosting server. It is commonly used to upload website files, make edits, or manage your site’s structure. If you or others regularly use FTP accounts, it’s important to monitor access to prevent unauthorized activity.
2. Accessing the FTP Connections Tool
To monitor FTP activity:
- Log in to your cPanel account at: https://cpanel.sitedeploy.com
- Scroll down to the Files section.
- Click on FTP Connections.

This will take you to the FTP session monitor, where all current connections are displayed in a table format.
3. Understanding the FTP Connections Page
Once inside the FTP Connections tool, you’ll see a table listing all active FTP sessions. Each row represents one active user session and includes the following details:
- User – The FTP account username currently connected.
- Logged in From – The IP address of the user accessing the server.
- Login Time – The time and date the user connected.
- Status – Current state of the connection (e.g., IDLE or transferring data).
- Process ID (PID) – A unique identifier for the session.
- Actions – An option to disconnect a session if necessary.

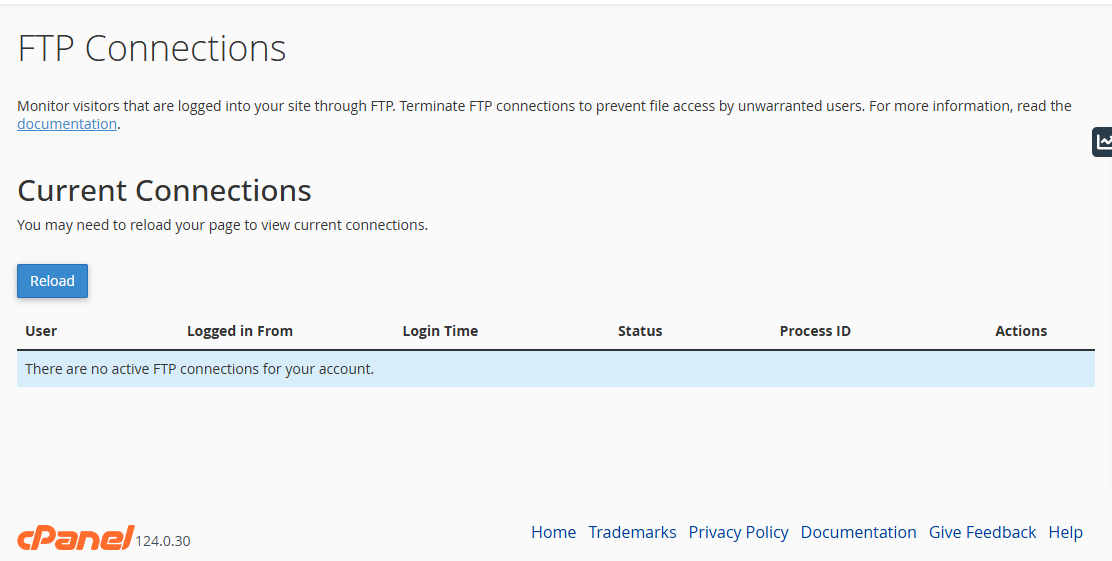
4. How to Monitor FTP Sessions
- Check for Active Users:
Review the list to see all users currently connected via FTP. - Look for Suspicious Activity:
Pay attention to unknown usernames, unfamiliar IP addresses, or odd login times. - Refresh the List:
Click the Reload button to update and get the most recent data.
5. Terminating Unwanted FTP Connections
If you notice a session that appears suspicious or unauthorized, follow these steps to disconnect it:
- Locate the session in the FTP Connections table.
- In the Actions column, click Disconnect next to the session you want to terminate.
- Click Reload to confirm that the session has ended.
This will immediately close the FTP connection and prevent further file access under that session.
6. System Recommendations for FTP Security
To help you protect your website files, follow these best practices:
- Use Secure FTP (SFTP):
Whenever possible, use SFTP instead of standard FTP to encrypt file transfers. - Limit FTP Access:
Only give FTP access to users who need it. Restrict access to specific IP addresses if supported. - Monitor FTP Sessions Regularly:
Get into the habit of checking FTP Connections to ensure no unauthorized users are logged in. - Update FTP Passwords Periodically:
Strong, regularly updated passwords help prevent brute-force and unauthorized access. - Disable Unused FTP Accounts:
If an account is no longer needed, remove or suspend it to reduce risk.
The FTP Connections tool in cPanel is a powerful feature that helps you manage and secure your website by monitoring real-time FTP activity. Regularly reviewing this section and terminating suspicious sessions ensures that only authorized users can access your website files.
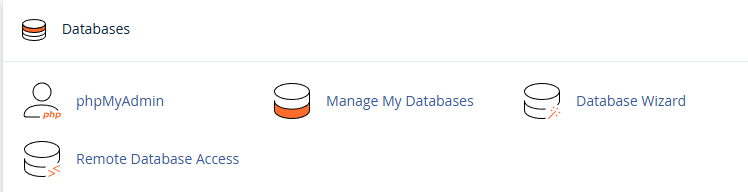
About Databases
cPanel provides powerful, easy-to-use tools that help you create, manage, and maintain databases for your website or web applications. Whether you're installing a content management system (CMS) like WordPress, setting up a web app, or storing user data, these tools make database management accessible even to users with limited technical experience.
The two primary tools for managing databases in cPanel are:
-
phpMyAdmin – A graphical interface for direct database interaction.
-
Database Wizard – A step-by-step guide to creating databases and users quickly and securely.
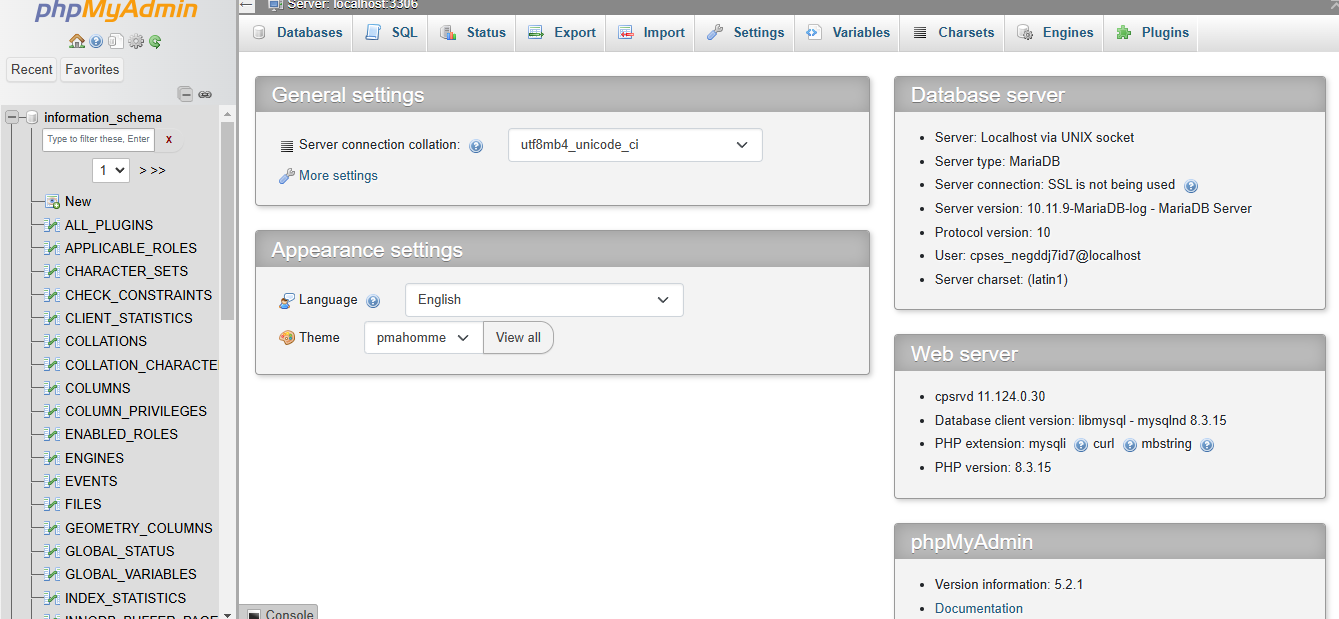
1. Managing Databases with phpMyAdmin
phpMyAdmin is a web-based tool that lets you manage your MySQL databases using a visual interface. It provides access to advanced functions without the need to write SQL queries manually, although those with experience can still execute custom SQL commands.
How to Access phpMyAdmin:
-
Log in to your cPanel account.
-
Scroll to the Databases section.
-
Click on phpMyAdmin.

This will open a new browser window with the phpMyAdmin interface.
What You Can Do with phpMyAdmin:
-
Create New Databases
Use phpMyAdmin to manually create databases if needed. -
Manage Tables
Create, modify, and delete tables within a selected database. You can also define relationships between tables and adjust structures as your project evolves. -
Run SQL Queries
Write and execute custom SQL statements to insert, retrieve, update, or delete data. -
Import and Export Databases
Easily back up or restore data by exporting or importing entire databases or selected tables in formats like SQL, CSV, XML, and more. -
Manage Users and Permissions
Assign specific privileges to users, limit access, or update passwords as needed.
Key Features:
-
Browse and Edit Data
Navigate through your database tables, view entries, and edit rows directly. -
Search Capability
Quickly search for specific values or records within your tables. -
View Database Structure
Understand and modify how your tables are built, including columns, types, and indexes. -
Backups and Recovery
Export entire databases as backup files, which can be restored at any time using the import function.
phpMyAdmin is ideal for users who want full control over their databases or need to perform specific administrative tasks on the backend of a web application.
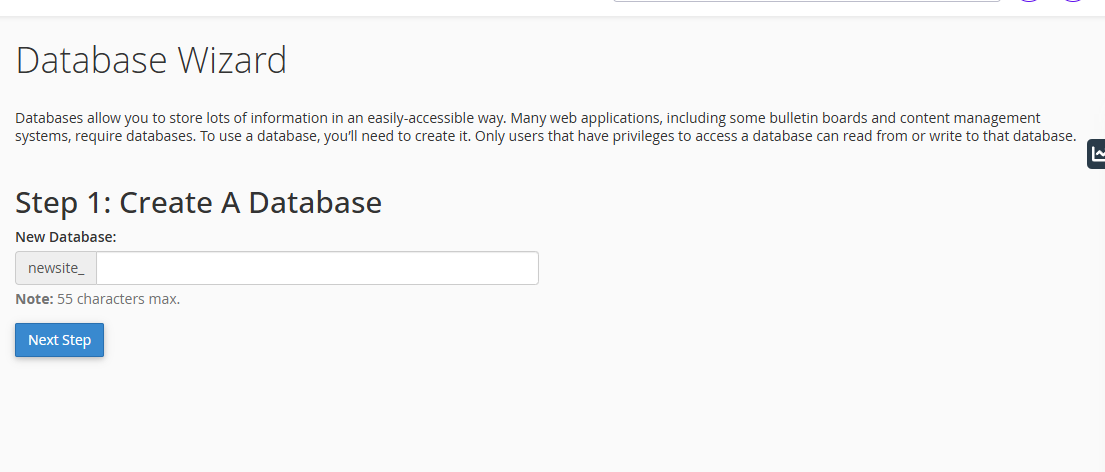
2. Creating Databases with the Database Wizard
The Database Wizard is perfect for users who are new to database management. It simplifies the process by guiding you step-by-step through the creation of a database, database user, and permission assignment.
How to Access the Database Wizard:
-
Log in to cPanel.
-
Go to the Databases section.
-
Click on Database Wizard.

Steps to Use the Database Wizard:
Step 1: Create a Database
-
Enter a unique and descriptive name for your new database.
Example:myblog_data -
Click Create Database.
-
A confirmation message will appear once the database is created.

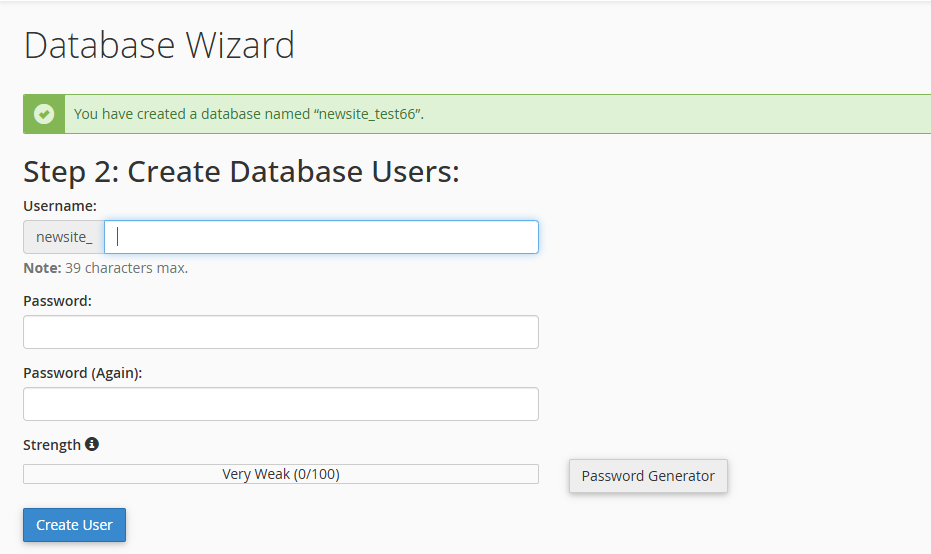
Step 2: Create a Database User
-
Choose a username for the new user account associated with the database.
Example:bloguser -
Enter a secure password or use the Password Generator.
-
Click Create User.
-
A confirmation message will appear once the user is created.

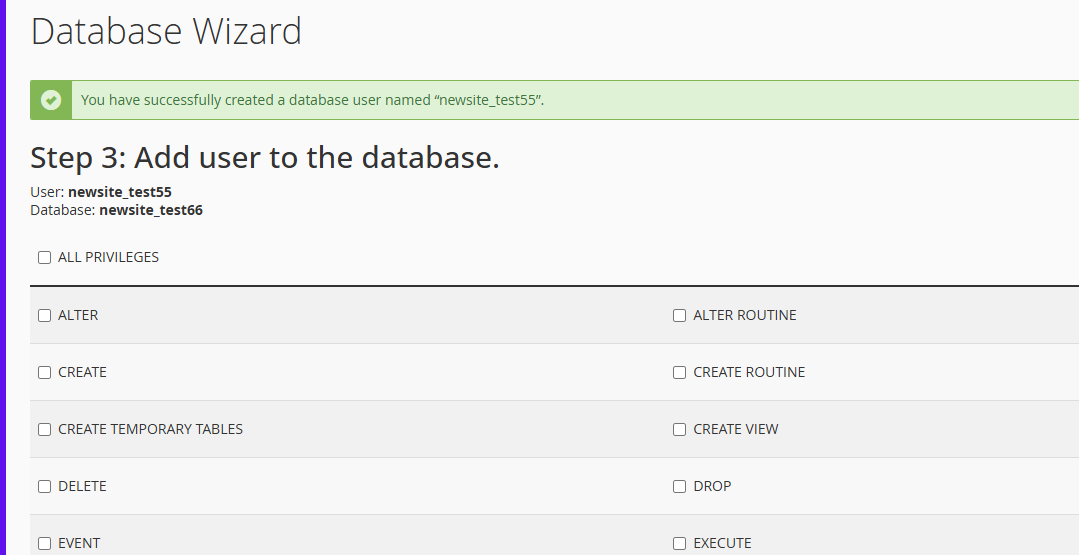
Step 3: Assign User Privileges
-
Choose the database and the user you just created.
-
Select the privileges the user should have:
-
All Privileges – Grants full access to the database (ideal for administrators or trusted apps).
-
Specific Privileges – Select specific permissions such as SELECT (read), INSERT (add), UPDATE (modify), DELETE (remove), etc.
-
-
Click Make Changes to apply the permissions.

You’ve now successfully set up a database and user account that can be used by your website or web application.
Best Practices for Database Management
-
Use Strong Passwords
Always use complex, unique passwords for database users to prevent unauthorized access. The password generator in cPanel is highly recommended. -
Assign Minimal Privileges
Only grant the permissions needed for a specific user or app. For example, if the user should only retrieve data, avoid granting write or delete privileges. -
Name Databases Clearly
Use meaningful names to identify the purpose of each database, especially when managing multiple websites or applications. -
Perform Regular Backups
Back up your databases before making major changes or updates. You can use phpMyAdmin’s export tool or cPanel’s Backup section. -
Monitor for Unused Databases
Delete any databases that are no longer in use to keep your hosting environment clean and secure.
Whether you are launching a blog, developing a web app, or managing customer data, cPanel gives you the tools to create and control databases effectively.
-
Use phpMyAdmin for hands-on management and detailed tasks.
-
Use the Database Wizard for fast, guided setup.
Both tools provide everything you need to support the database needs of your website securely and efficiently.
About Domains
cPanel includes powerful tools that allow users to quickly launch websites, customize site designs, and manage domain settings—all from one convenient location. Whether you're building a temporary landing page, a full-featured site, or managing domain redirections, this guide will walk you through everything step-by-step.
1. Creating a Simple Website with Site Publisher
The Site Publisher tool is designed for users who need to quickly publish a basic website using pre-built templates. This is ideal for small businesses, portfolios, or placeholders while a full website is being developed.
a. Accessing Site Publisher:
-
Log in to your cPanel account.
-
Navigate to the Domains section.
-
Click on Site Publisher.

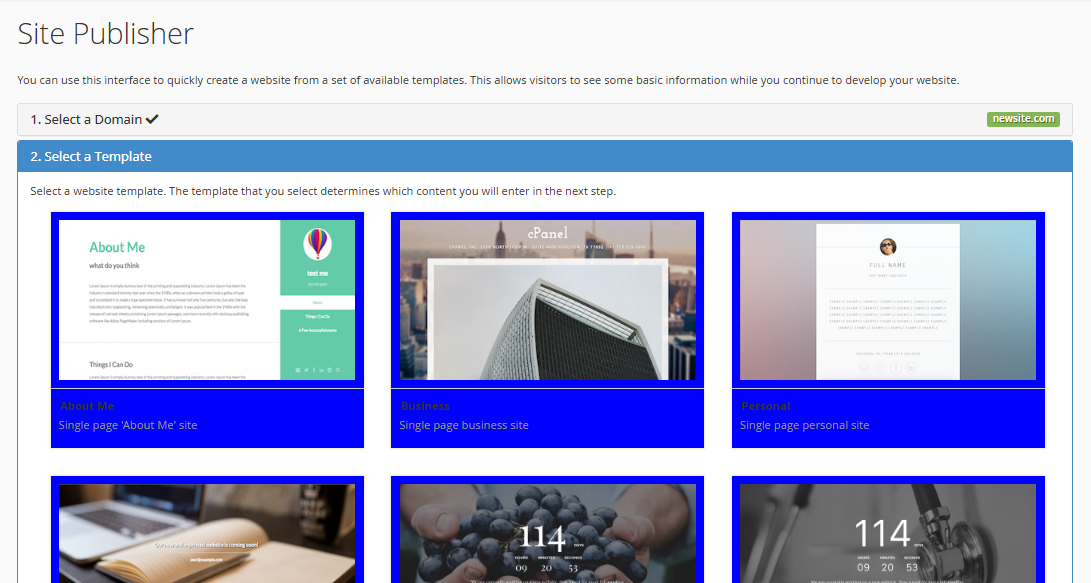
b. How to Use Site Publisher:
Select a Domain and Template
-
Choose the domain you want to publish the site on.
-
Select a template that matches your needs (business, personal, portfolio, etc.).
Customize Website Content
You’ll be asked to fill in various fields depending on the template, including:
-
Business Name
-
Tag Line
-
Company Description
-
About Us Section
-
Contact Details (Address, Phone, Email)
-
Operating Hours
-
Social Media Links
-
Google Maps Location
-
Google Analytics Tracking ID
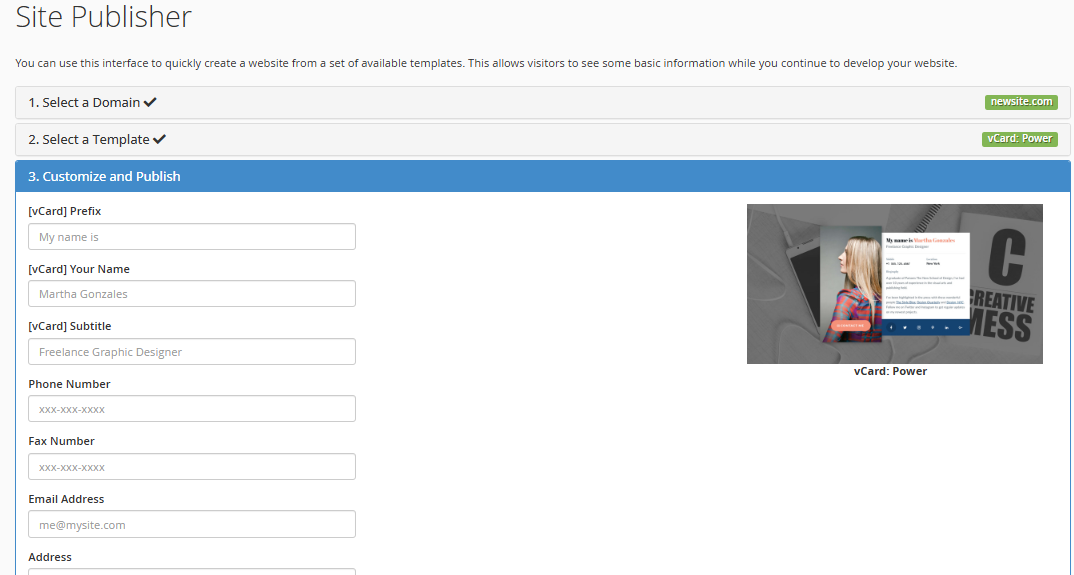
These fields are optional, but the more you complete, the more polished your site will appear.
Publish Your Website
After entering your information, click Publish.
Your site will go live instantly using the selected template and your content.
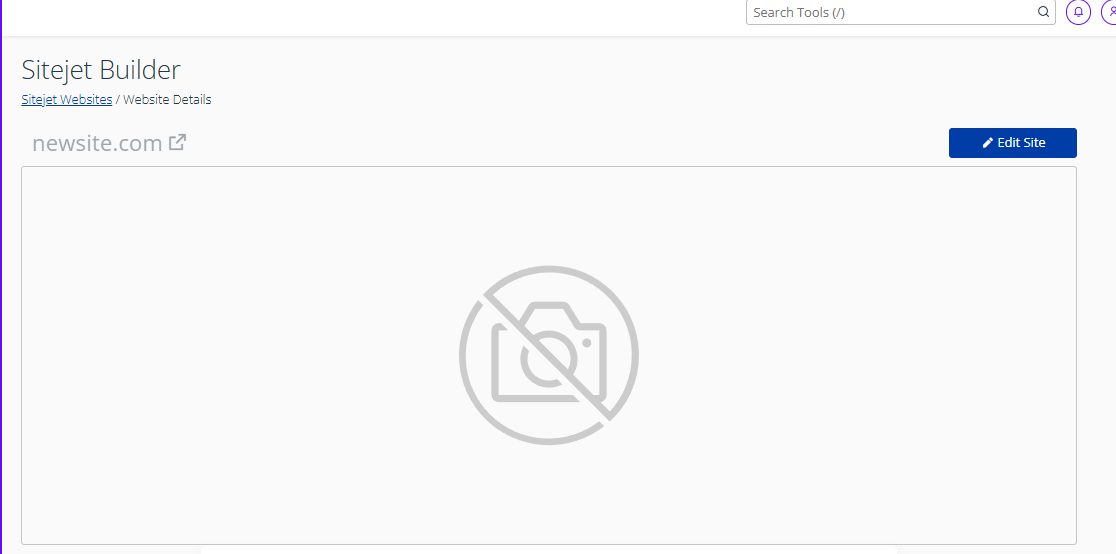
2. Building Custom Websites with Sitejet Builder
Sitejet Builder is a drag-and-drop website builder included with cPanel. It’s perfect for creating visually appealing, fully customized websites without needing to write any code.
a. Accessing Sitejet Builder:
-
Log in to cPanel.
-
Go to the Sitejet Website Builder or look under the Domains or Software section.
-
Select the domain you want to work with.
-
Click Edit Site to launch the builder.

b. How to Use Sitejet Builder:
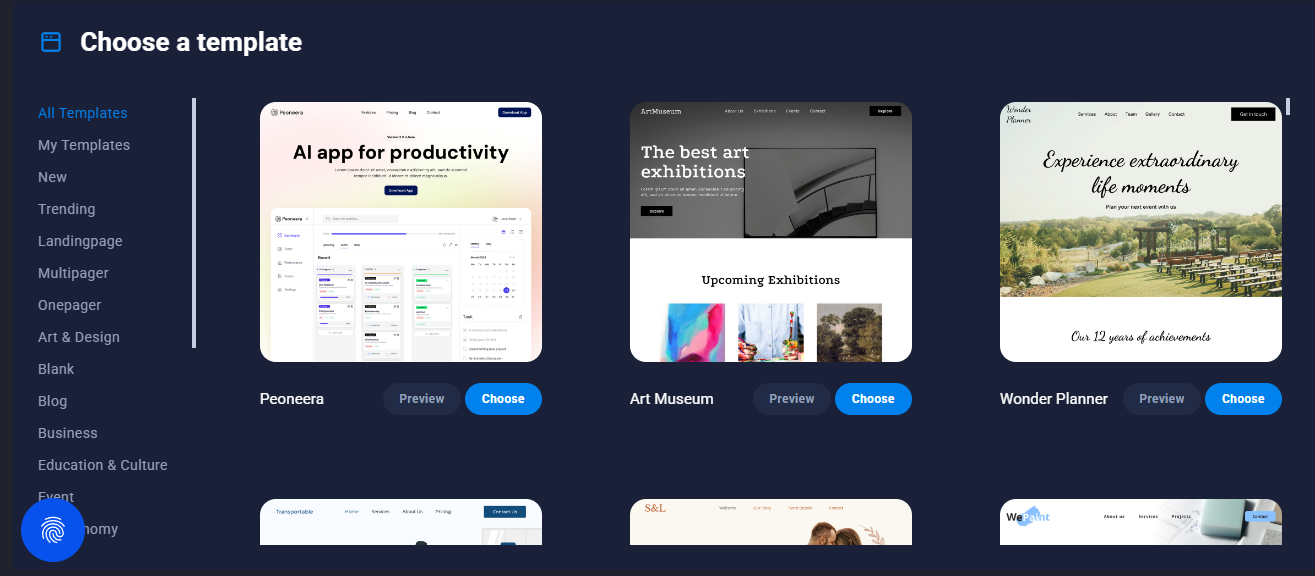
Choose a Template
-
Browse through the template library.
-
Pick one that suits your site’s purpose (e.g., restaurant, portfolio, online service).

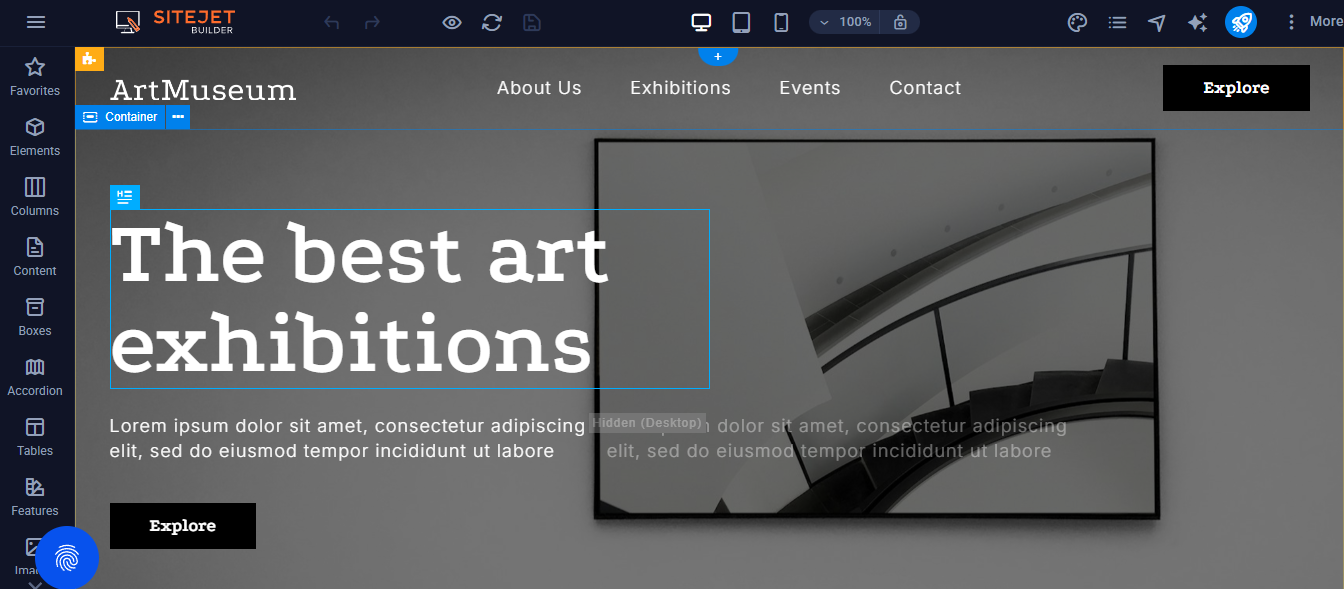
Customize Using Drag-and-Drop
You can easily build your site by dragging and arranging elements on the page:
-
Add sections such as headers, footers, image sliders, and content blocks.
-
Modify fonts, colors, layouts, and themes.
-
Add interactive elements like forms, maps, and social media icons.
c. Update Content
Click into any section to edit text, images, links, or other components. Everything is live-previewed as you go.
Publish Your Website
Once you’re satisfied with your design, click Publish.
Your custom-built website will go live and be accessible on the selected domain.
Sitejet makes it easy to create professional-grade websites without needing technical experience.
3. Managing Domains in cPanel
The Domains tool allows you to add and configure domain names linked to your hosting account. Whether you want to host multiple websites, set up subdomains, or manage HTTPS redirects, this tool gives you full control.
a. Accessing the Domains Tool:
-
Log in to your cPanel account.
-
Navigate to the Domains section.
-
Click on Domains.
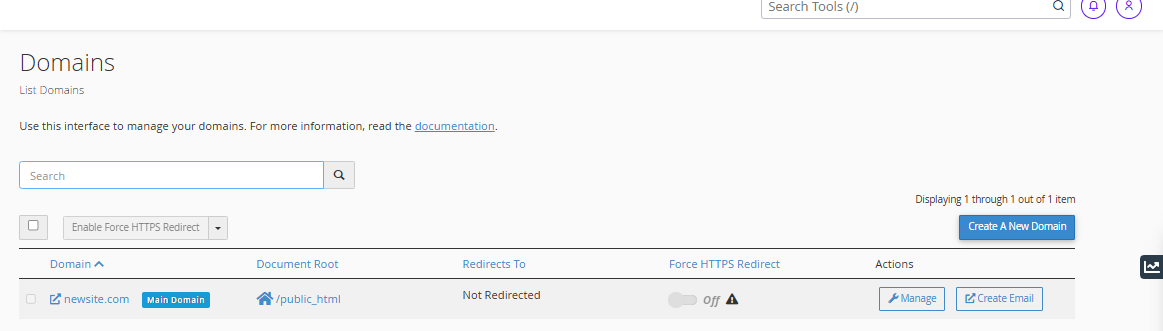
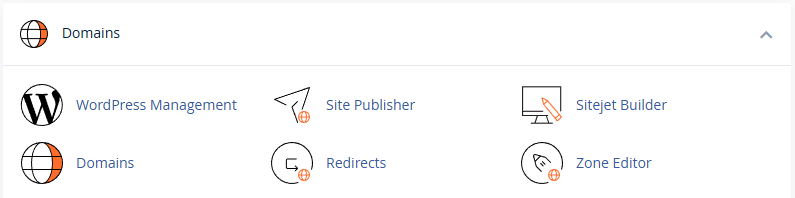
b. Domains Interface Overview
The Domains list shows all domains currently associated with your account. For each domain, you'll see:
-
Domain Name – The website address.
-
Document Root – The folder on the server where files for this domain are stored.
-
Redirect To – Displays if the domain is redirecting to another site.
-
Force HTTPS Redirect – Shows whether secure HTTPS is enforced.
-
Actions – Options to manage or delete the domain.

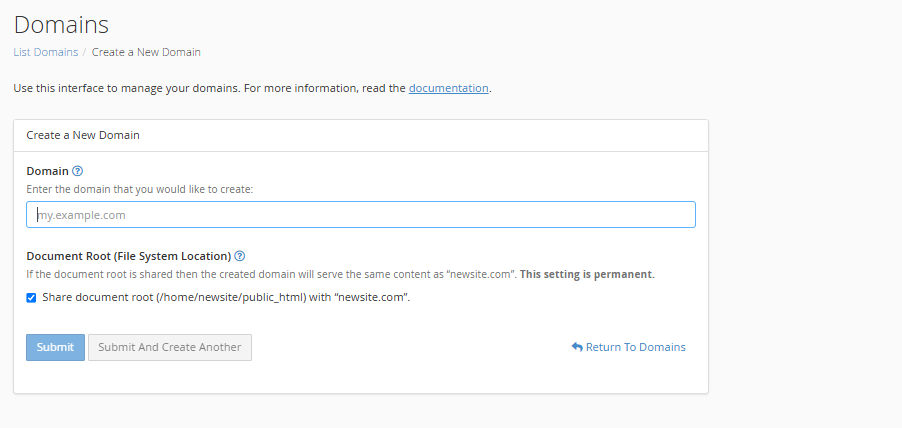
c. Adding a New Domain
To add a new domain:
-
Click Create a New Domain.
-
Enter the domain name you want to add (e.g., yournewsite.com).
-
Set the document root if you want to customize where files are stored.
-
Click Submit to complete the setup.

Your new domain will be added to the list. From there, you can:
-
Upload files via File Manager or FTP
-
Set up email addresses for the domain
-
Redirect it to another website
-
Configure SSL certificates for HTTPS access
Best Practices for Managing Domains and Sites
-
Use HTTPS Redirects: Always enable "Force HTTPS Redirect" to ensure your visitors access your site securely.
-
Keep Sites Updated: Whether using Site Publisher or Sitejet, regularly update your content to stay relevant.
-
Use Meaningful Folder Names: When adding new domains, keep document root folders organized and clearly named.
-
Limit Redundancy: Only keep domains and subdomains you're actively using.
-
Back Up Your Website Files: Before making major changes, download a backup via cPanel’s Backup or File Manager tools.
cPanel offers a full suite of website and domain management tools:
-
Use Site Publisher to create a fast and functional landing page.
-
Build visually rich sites with Sitejet’s drag-and-drop editor.
-
Add, manage, and configure domains easily using the Domains tool.
These features give you control, flexibility, and the freedom to build your online presence—no coding required.
About WP ToolKit
cPanel includes powerful domain and site management tools, and one of the most valuable for WordPress users is the WordPress Toolkit (WT). This tool simplifies the process of installing, managing, and maintaining WordPress websites—all from a single, easy-to-use dashboard.
This guide will walk you through each section of the WordPress Toolkit so you can confidently manage your WordPress sites without needing technical experience.
1. Accessing the WordPress Toolkit
To open the WordPress Toolkit:
-
Log in to your cPanel account.
-
Scroll to the Domains or Applications section.
-
Click on WordPress Toolkit.

You’ll be taken to the WordPress management dashboard, where all your WordPress sites are listed and grouped under the following sections: Installations, Plugins, and Themes.
2. Installations
The Installations section allows you to manage existing WordPress sites or install new ones with just a few clicks.
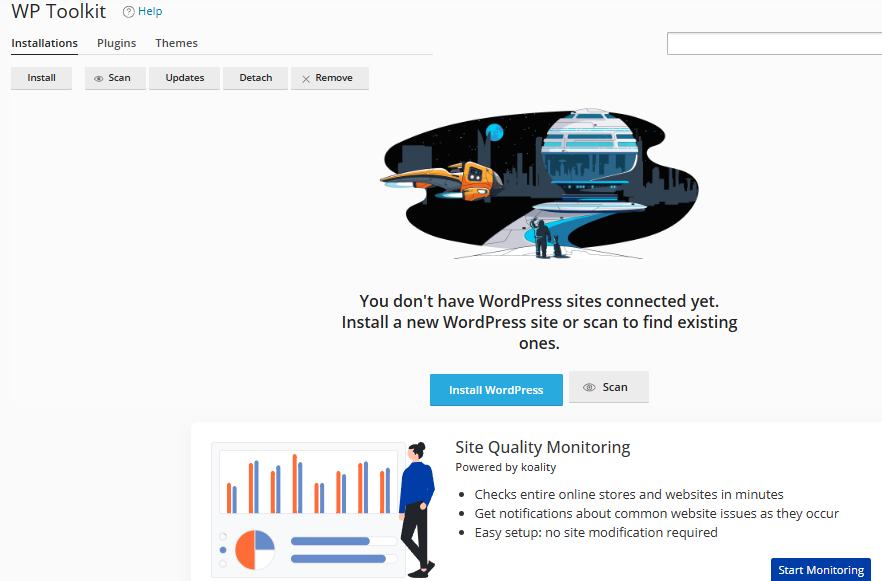
Key Features:
-
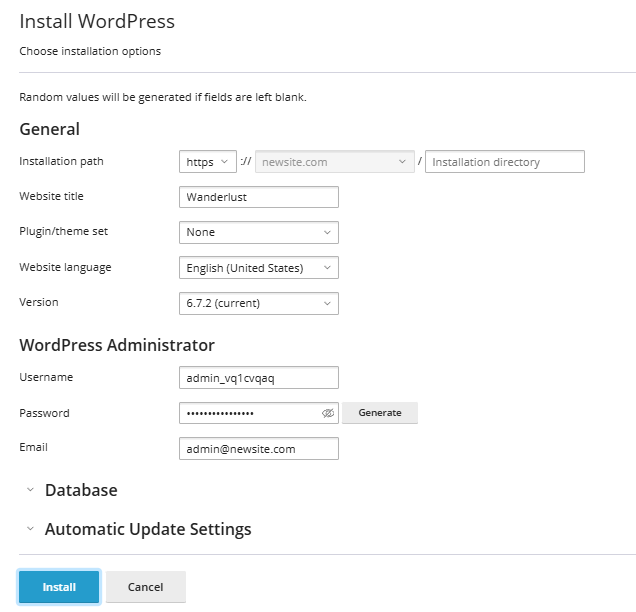
Install New WordPress
Start a new WordPress site easily by clicking “Install”. The Toolkit will guide you through setting up the site, admin credentials, and database automatically. -
Scan Existing Installations
If you already have a WordPress site installed manually or through another tool, you can use the “Scan” option to detect and add it to your Toolkit dashboard. -
Website Quality Monitoring
WordPress Toolkit automatically scans your site for:-
Outdated plugins and themes
-
Missing security updates
-
Performance issues
-
Configuration problems
-
-
Real-Time Notifications
The system provides real-time alerts to help you identify and fix issues as soon as they arise, improving your site’s stability and performance.
This makes managing one or multiple WordPress sites easier and more efficient, especially for users who want a quick overview of their website health.
3. Plugins
The Plugins section gives you full control over the plugins installed on your WordPress sites.
What You Can Do:
-
View Installed Plugins
See all active and inactive plugins for each WordPress installation. -
Manage Plugins
-
Activate or deactivate plugins
-
Delete unused plugins
-
Update plugins directly from the interface
-
-
Install New Plugins
Search the WordPress repository and install plugins with one click.
You can also upload custom plugin files from your computer.
Managing plugins through the Toolkit ensures your site remains secure, functional, and up to date.
4. Themes
The Themes section allows you to manage the visual design of your WordPress sites.
What You Can Do:
-
View Installed Themes
See all themes currently available in your WordPress installation. -
Activate Themes
Quickly switch between themes by selecting and activating your preferred design. -
Manage Themes
-
Enable or disable themes
-
Delete unused themes
-
Update to the latest version
-
-
Install New Themes
You can browse and install themes directly from the WordPress repository or upload a custom theme file from your local device.
This makes it easy to refresh your site’s appearance or test new layouts without manually accessing your WordPress admin panel.
Best Practices for Managing WordPress with the Toolkit
-
Keep Everything Updated
Regularly update your WordPress core, themes, and plugins to prevent security issues. -
Remove Unused Plugins and Themes
Deactivate and delete anything you're not actively using to improve site performance and reduce vulnerability. -
Monitor Website Health Regularly
Use the Toolkit's built-in monitoring to stay ahead of issues before they affect your site. -
Use Strong Passwords
Always use secure passwords for WordPress admin accounts and database users.
The WordPress Toolkit in cPanel gives you complete control over your WordPress sites—from installation to optimization—in one centralized location. Whether you’re running a personal blog, a business site, or multiple websites, the Toolkit makes WordPress management simple, secure, and efficient.
About Cron jobs
Cron Jobs in cPanel allow you to automate recurring tasks by scheduling commands or scripts to run at specific times. This is especially useful for automating maintenance processes such as clearing temporary files, running database backups, or sending scheduled reports.
By using Cron Jobs, you can ensure important scripts run consistently and on time—without manual effort.
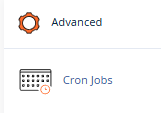
1. Accessing the Cron Jobs Tool
To begin setting up automated tasks:
-
Log in to your cPanel account.
-
Scroll to the Advanced section.
-
Click Cron Jobs.

This opens the Cron Jobs interface where you can create new scheduled tasks or manage existing ones.
2. Understanding How Cron Jobs Work
A cron job is a time-based task that runs a command or script automatically, according to a schedule you define. You control when a task runs by setting time intervals using five fields:
-
Minute (0–59)
-
Hour (0–23)
-
Day (1–31)
-
Month (1–12)
-
Weekday (0–7, where 0 and 7 represent Sunday)
For example:
To run a task at 2:00 AM every day, use the following settings:
| Schedule | Settings |
|---|---|
| Once Daily | Minute: 0, Hour: [your hour], Day: *, Month: *, Weekday: * |
| Every Hour | Minute: 0, Hour: *, Day: *, Month: *, Weekday: * |
| Weekly | Minute: 0, Hour: 3, Day: *, Month: *, Weekday: 1 (Monday) |
3. Adding a New Cron Job
To schedule a new task:
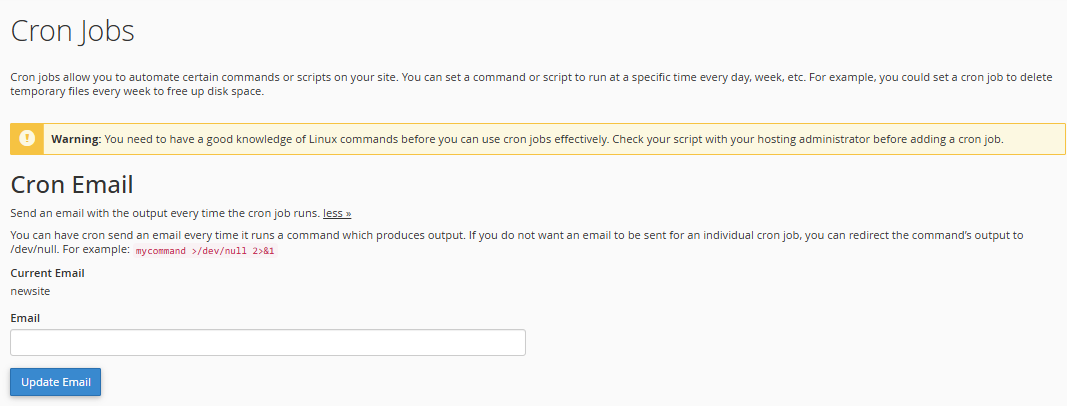
Step 1: Configure Email Notifications
-
If you'd like to receive an email every time the cron job runs, enter your email address in the Cron Email field.
-
If you do not want to receive emails for a particular job, add this to the end of the command:
This prevents your inbox from being flooded with cron output.
Step 2: Set the Time Intervals
-
Use the dropdown menus to select when you want your command to run.
-
You can customize this based on minute, hour, day, month, and weekday.

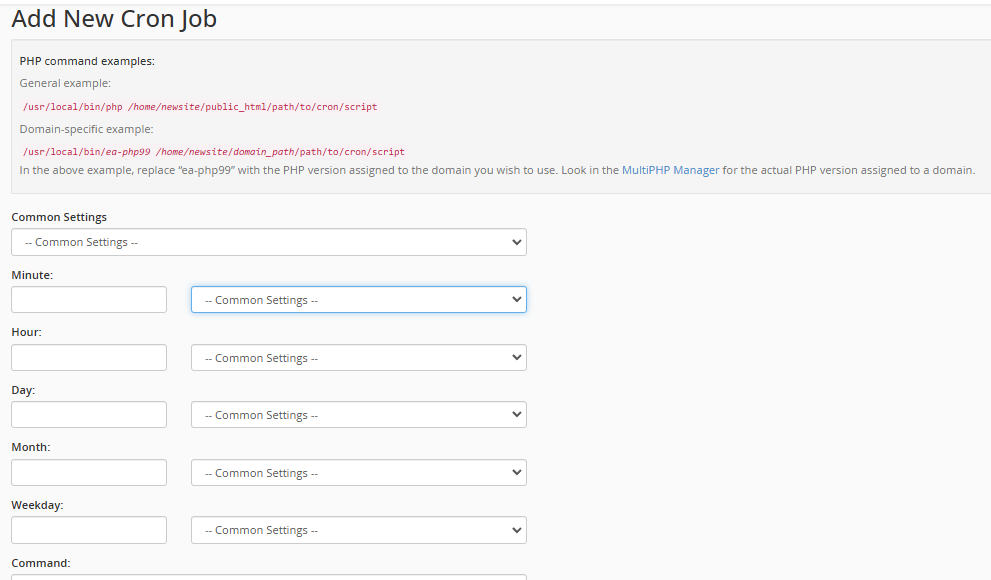
Step 3: Enter the Command
In the Command field, enter the script you want to execute. Examples:
General PHP Command:
swift/usr/local/bin/php /home/username/public_html/path/to/cron/script.php
PHP Command with Custom Version (Domain-Specific):
swift/usr/local/bin/ea-php81 /home/username/public_html/path/to/cron/script.php
Replace ea-php81 with the PHP version assigned to your domain (check via MultiPHP Manager in cPanel).
Step 4: Add the Cron Job
Click Add New Cron Job. The task will now appear in your list of current cron jobs.
4. Managing Existing Cron Jobs
Once created, your cron jobs will appear in the Current Cron Jobs section.
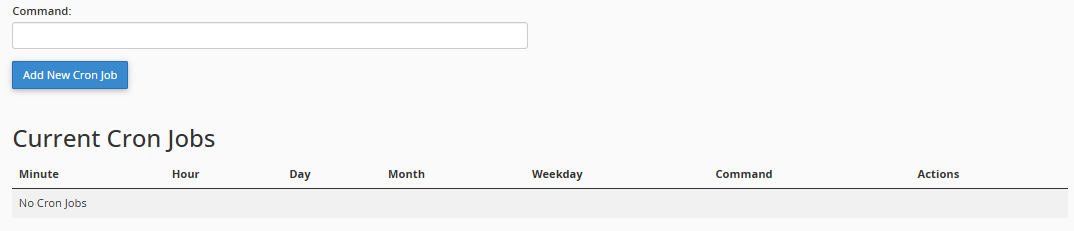
This table displays the following information:
| Minute | Hour | Day | Month | Weekday | Command | Actions |
|---|---|---|---|---|---|---|
| * | 2 | * | * | * | /usr/local/bin/php /home/newsite/public_html/path/to/cron/script | [Edit] [Delete] |
Each entry shows:
-
Scheduled time (minute, hour, day, month, weekday)
-
The command to be run
-
Action options: Edit or Delete
You can use these options to:
-
Modify the schedule or command of an existing job
-
Remove jobs that are no longer needed
5. Cron Job Email Notifications
By default, cPanel will send an email with the output of your cron job to the email listed in the Current Email field. This is useful for monitoring whether tasks complete successfully.
-
To change the notification email, update the address in the Cron Email section at the top of the Cron Jobs interface.
-
To disable email notifications for a specific job, append the command with:
6. Best Practices for Using Cron Jobs
-
Test Scripts First: Always run your script manually before scheduling it to ensure it works as expected.
-
Use Secure Commands: Make sure the script or command you enter doesn’t contain errors or unsafe operations.
-
Avoid Unnecessary Jobs: Only schedule tasks that are needed. Overusing cron jobs can affect server performance.
-
Monitor Output: Check your email reports (or logs) to ensure tasks run successfully.
-
Use Full Paths: Always specify the full path to your script or command to avoid errors.
-
Know Your Hosting Limits: Some hosting providers limit how often cron jobs can run or how many are allowed. Contact your provider if you’re unsure.
Cron Jobs in cPanel are a powerful way to automate routine or recurring website tasks. Whether you’re managing backups, sending email reports, or maintaining databases, cron jobs can help you save time and ensure tasks are performed consistently.
Take time to carefully configure your job schedules, use full command paths, and monitor performance to get the most from this feature.