How to Install and Use Your WordPress Plugin & Theme Manager
Welcome! You've received a custom WordPress plugin that gives you access to a library of over 1500+ premium plugins and themes—all from right inside your WordPress dashboard. This guide will walk you through how to install and start using it in just a few minutes.
Step 1: Download the Plugin File
-
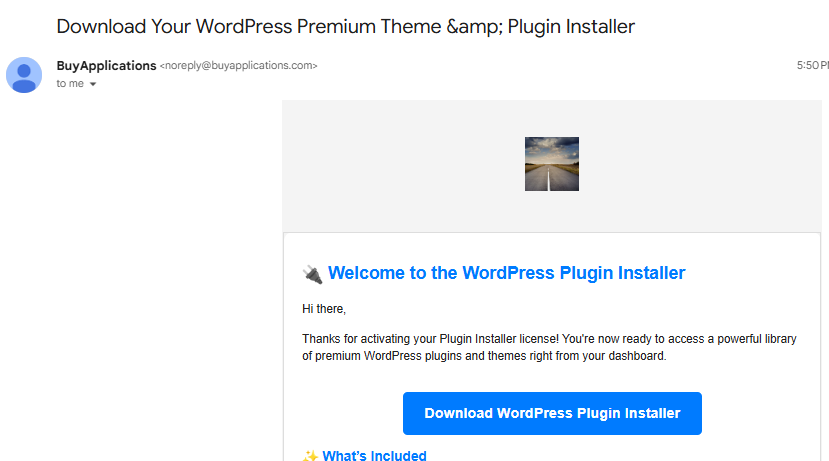
Check your email for a message from Buy Applications.
-
Download the attached ZIP file – this is your custom plugin package.
-
Save the file somewhere you can easily access (like your desktop or downloads folder).
Step 2: Install the Plugin on Your WordPress Site
-
Log into your WordPress admin dashboard (e.g.,
yourwebsite.com/wp-admin). -
In the left-hand menu, go to Plugins → Add New.
-
At the top of the page, click the “Upload Plugin” button.
-
Click “Choose File” and select the ZIP file you downloaded earlier.
-
Click “Install Now” and wait for the upload to finish.
-
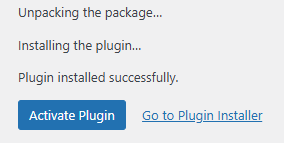
Once installed, click the “Activate Plugin” button.
Step 3: Access Your Plugin
-
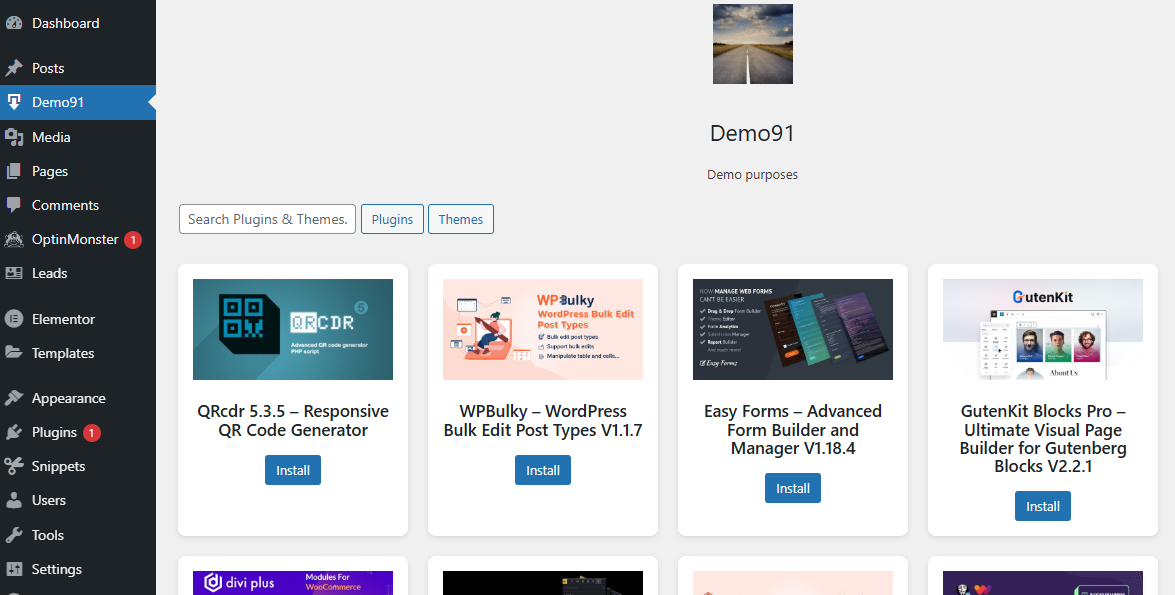
After activation, you’ll see the plugin appear in the WordPress left sidebar.
Here, you’ll see:
-
Your plugin’s name, description, author info, and logo (if provided).
-
A large searchable table of 1500+ plugins and themes available for install.
Step 4: Install Plugins and Themes
-
Browse or search through the available plugins and themes.
-
Each item includes a name, description, version, and install/download button.
-
Click “Install” on any item to instantly add it to your WordPress site.
🔄 Updates are automatic — no need to manually update the items you install.
Tips & Notes
-
This plugin is licensed for your specific website only.
-
You don’t need to register or pay again for the individual items—everything is included under your subscription.
-
If you ever deactivate the plugin or subscription, access to the plugin library may be paused.


